


First Leather Project: Patching Dan's Chinks
After consulting an experienced leather worker, I patched Dan's torn chinks and made them functional again!

Cowboys commonly wear chinks, chaps, and other types of leather leg coverings while horseback. Not only do they look cool af, they protect your pants and skin against scratchy trees and barbed wire. They also help you stay warm in cold, windy weather.
On hot summer days, Dan usually wears chinks, which are basically knee-length chaps. The pair he wears are ancient. They’re made out of an extremely tough type of leather, and yet Dan still wore a hole through the weak spot in the hip crease. That clued in the experienced leather worker I know, Les, into their approximate age. They’re easily decades old!
Since those chinks are so cool, storied, and otherwise functional, I wanted to repair them. You might recall me talking about this project in an older post. Well, here’s an update: Les guided me through the patching process, and I fixed the broken chinks!

Here’s How I Did It
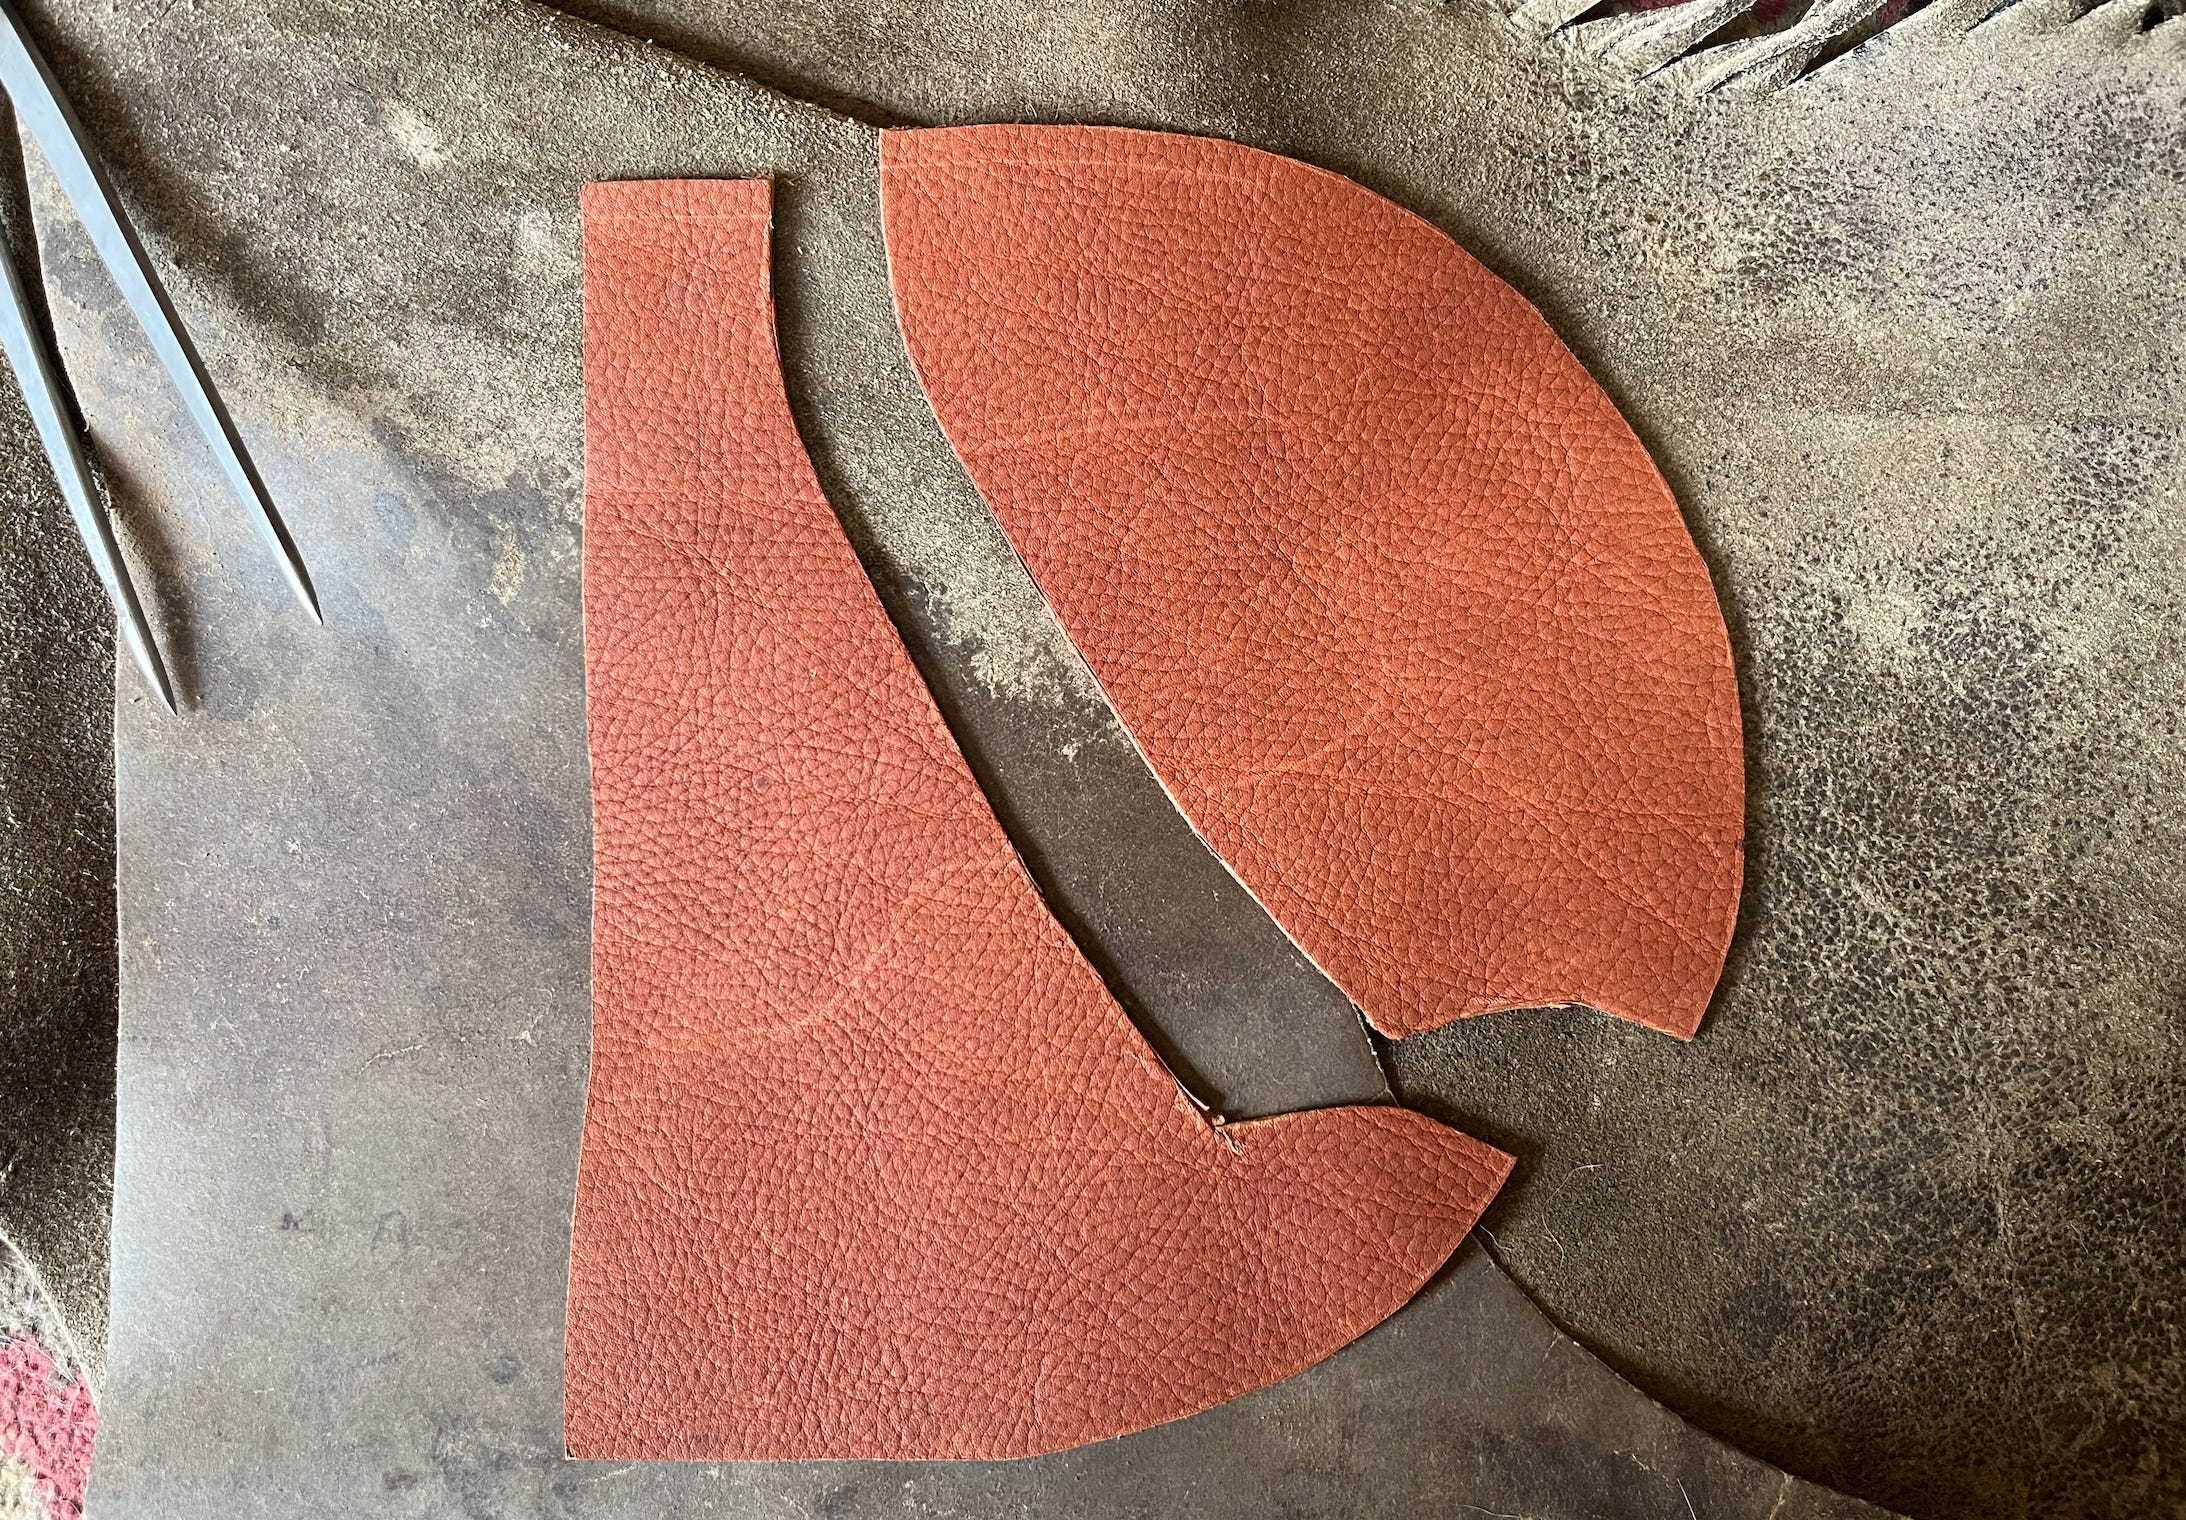
First, I traced the patch’s shape with a dull tool on the smooth side of the leather. Then, I cut the chunk out with a handy horseshoe-looking knife. The knife’s design enables its wielder to slice with long, smooth curves. Obviously, I am still developing this skill, but I was happy with how the overall patch shape turned out. After all, it’s just a patch. Plus, it belongs on the underside of the chinks, not the front. Even if I’d done an awful job cutting it out, no one would be the wiser.
I created this patch shape with comfort and functionality in mind. The top edge would nest nicely along the backside of the chinks’ belt, and the swooping edge along the bottom wouldn’t be felt along a pant leg or crease in an awkward way. Ideally, it’d sit smoothly against a pair of jeans while protecting the chinks from further wear and tear.
Next, I used contact cement to attach the patch to the chinks. I was careful to avoid getting the cement along the edges of the patch. That way, I wouldn’t have to piece through a layer of glue with the awl when punching needle holes.
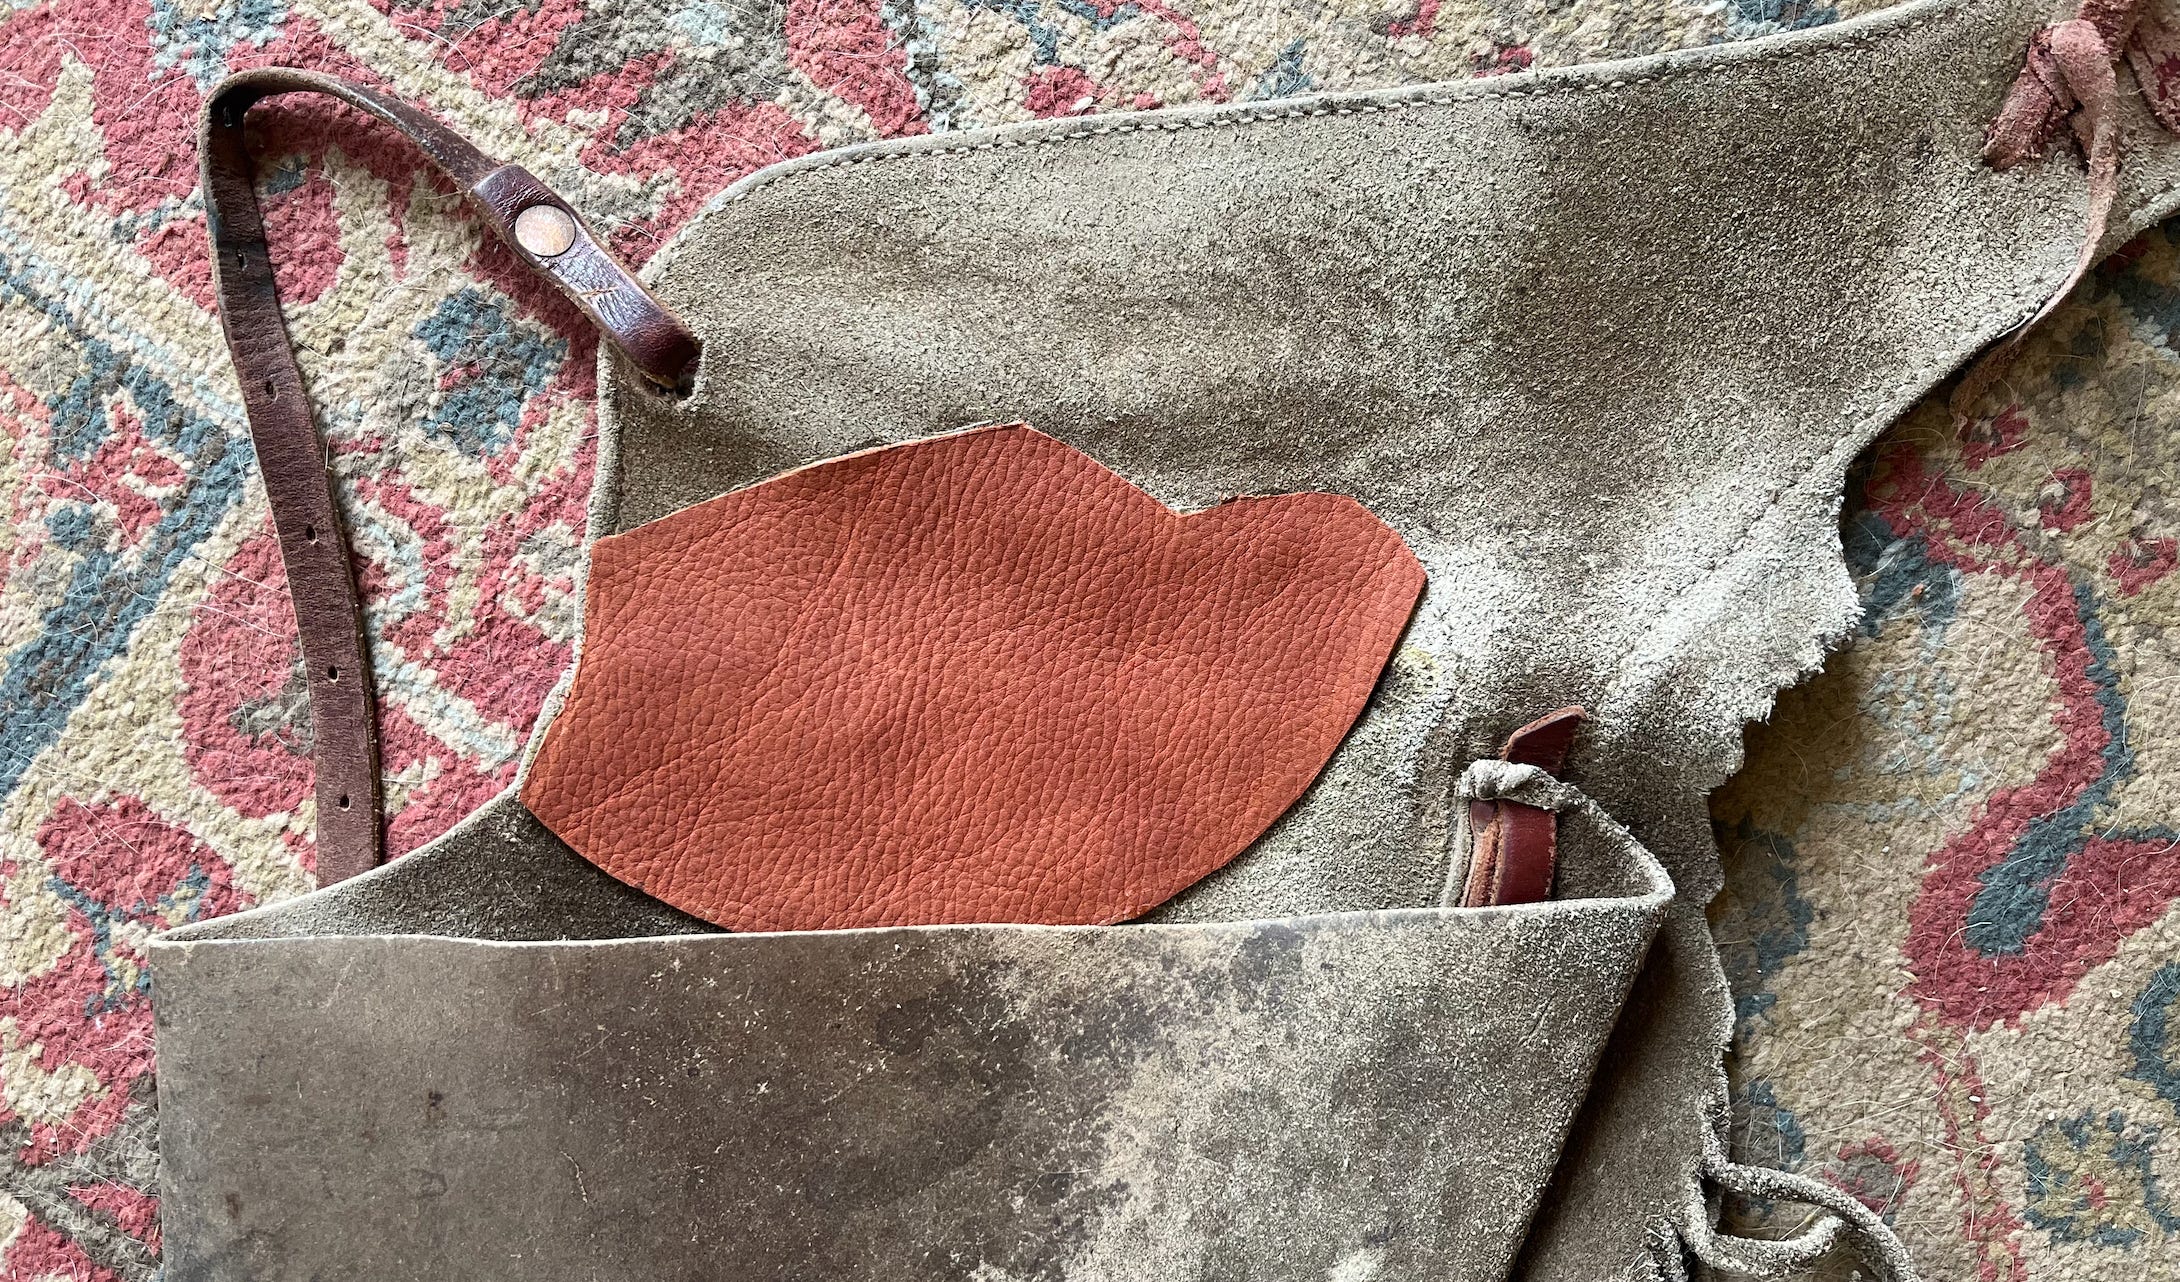
Once the glue was completely dry, I began the stitching process. This stitching was a bit unique because I couldn’t use the stitch mar on the front side of the chinks because the texture is so rough; the soft pock marks from the mar weren’t visible on the front-facing side of the patch job. So, I hand-awled the stitch holes along the chinks’ belt line and used the stitch mar along the bottom inside portion of the patch. The hand-awled holes aren’t quite as uniform, but at least they’re sound from a functionality standpoint.

After about 90 minutes of stitching, the patch was successfully attached to Dan’s favorite leathers. I am so stoked about how this project turned out. Hopefully, this patch job will last for years. If it doesn’t, well hey, I know how to fix it!

I Also Made Rosie A Leather Collar
To capitalize on my art project motivations, I made my dog Rosie a simple leather collar the night I finished Dan’s chinks. I figured a dog collar is a great low-risk opportunity to practice leather cutting and tooling. Turns out collars are easy to make, especially when you only have one type of buckle laying around. Maybe there’s a local market for handmade leather dog collars…

I’m thinking my next projects will be a journal jacket, a strap for Dan’s prosthetic arm, a simple wallet, a bow strap, and a holster for the .357 revolver my grandpa gave me. After I build more skill and confidence, I want to make a pair of chaps with an old cow elk hide I have.
Honestly, it just feels good to have a creative outlet that’s not writing!
What do you think about my patch job? Would you purchase a handmade leather dog collar? What’s your creative outlet? Drop a comment with your thoughts; I wan to hear from you!
Very impressed by your work! That patch stitching looks great!!!